cPanelin hakemistosuojausominaisuuden avulla voit rajoittaa pääsyä tiettyihin verkkosivustosi osiin. Kun suojaus on käytössä, käyttäjän on annettava oikea käyttäjätunnus ja salasana päästäkseen sisältöön. Tämä toiminto on hyödyllinen esimerkiksi yksityisten alueiden tai arkaluontoisen sisällön suojaamiseen.
Vaiheet hakemiston suojaamiseksi salasanalla
1. Kirjaudu cPaneliin
-
Avaa selain ja siirry cPanelin kirjautumissivulle, esimerkiksi: https://omadomainisi.fi/cpanel.
-
Syötä käyttäjätunnus ja salasana.
-
Klikkaa Kirjaudu sisään.
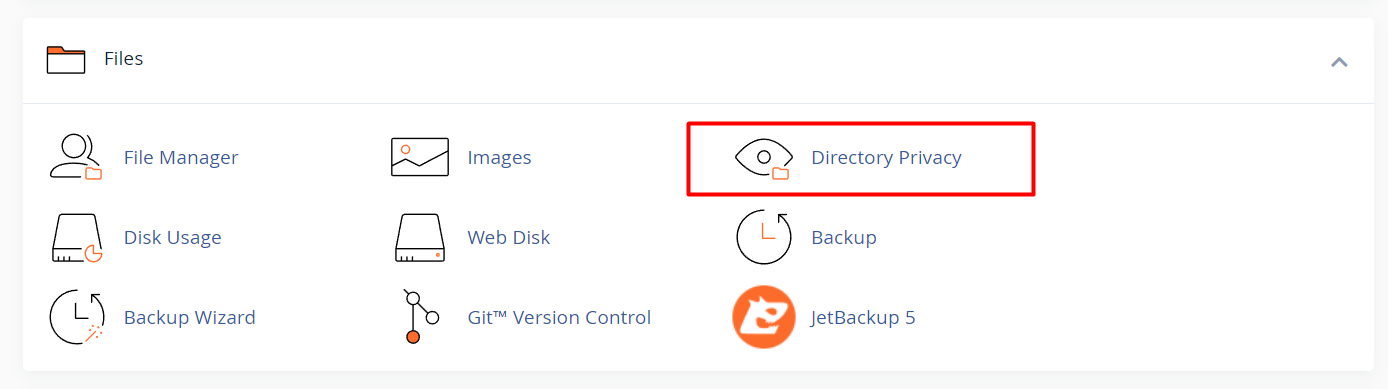
2. Avaa Directory Privacy -työkalu
-
cPanelin hallintanäkymässä siirry kohtaan Tiedostot (Files).
-
Klikkaa Directory Privacy (joissain tapauksissa nimellä Password Protect Directories).
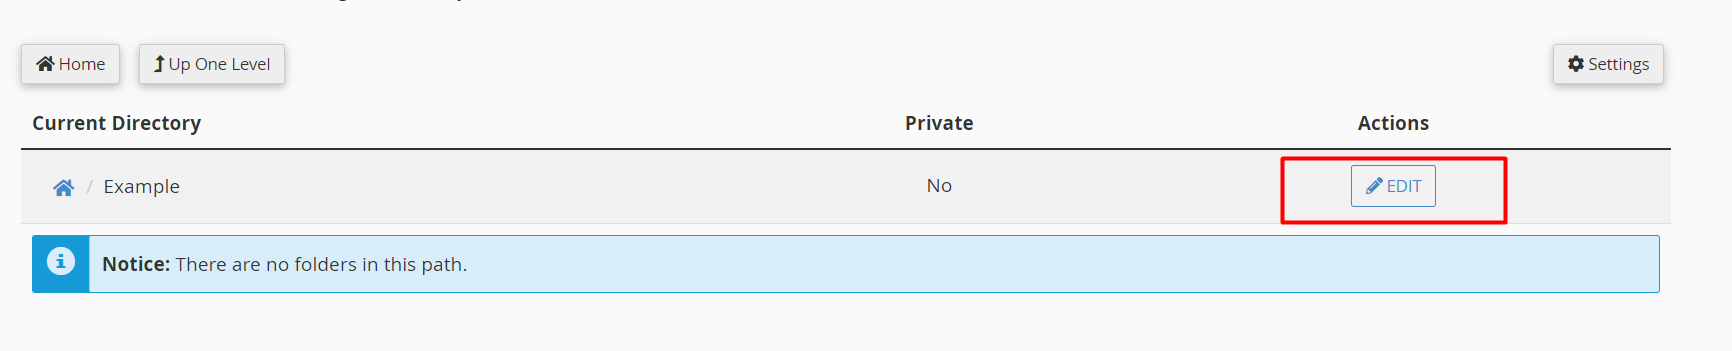
3. Valitse suojattava hakemisto
-
Näet listan palvelintilasi hakemistoista.
-
Selaa hakemistorakennetta ja etsi kansio, jonka haluat suojata.
-
Klikkaa hakemiston nimeä.
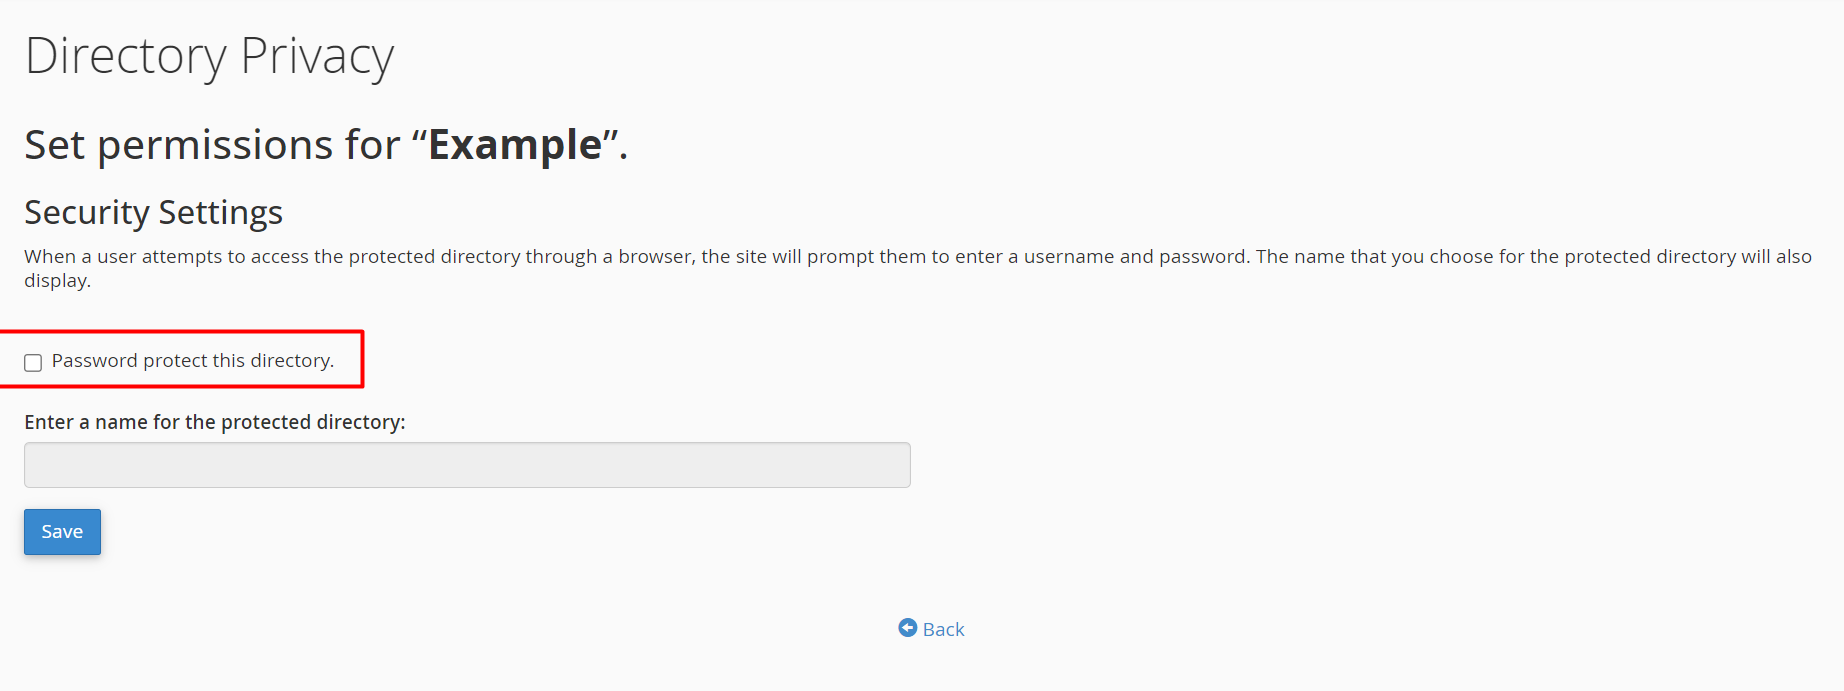
4. Ota salasanasuojaus käyttöön
-
Hakemistosivulla napsauta Muokkaa (Edit).
-
Valitse valintaruutu Password protect this directory.
-
Kirjoita Protected Directory Name -kenttään nimi tai kuvaus, joka näkyy kirjautumisikkunassa (esimerkiksi: Yksityinen alue).
5. Luo käyttäjätunnus ja salasana
-
Siirry alas kohtaan Create User tai Add a New User.
-
Syötä haluamasi käyttäjätunnus ja vahva salasana.
-
Syötä salasana uudelleen vahvistukseksi.
-
Klikkaa Tallenna (Save) tai Add/Modify Authorized User tallentaaksesi käyttäjätiedot.
6. Tarkista ja vahvista asetukset
-
Näytölle tulee vahvistusviesti, kun käyttäjä on lisätty onnistuneesti.
-
Voit lisätä lisää käyttäjiä toistamalla vaiheen 5.
-
Palaa Directory Privacy -etusivulle ja varmista, että hakemisto on suojattu.
7. Testaa suojaus
-
Avaa uusi selaimen välilehti tai ikkuna.
-
Siirry suojattuun hakemistoon, esimerkiksi: https://omadomainisi.fi/suojattu-kansio.
-
Näytölle pitäisi ilmestyä kirjautumisikkuna.
-
Syötä aiemmin luomasi käyttäjätiedot.
-
Onnistuneen kirjautumisen jälkeen pääset käsiksi hakemistoon. Jos kirjautuminen epäonnistuu, varmista tietojen oikeellisuus.


