Creating a post in WordPress is a simple yet essential process for adding content to your website. Follow the steps below to create a new post:
1. Log into Your WordPress Dashboard
Go to yourdomain.com/wp-admin and log in using your WordPress username and password.
2. Navigate to the Posts Section
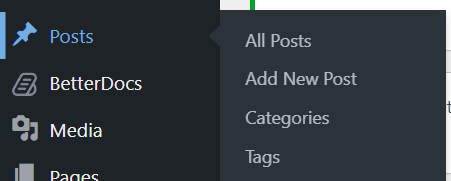
- In the left-hand menu, click Posts, then click Add New to open the post editor.
3. Enter a Title for Your Post
- At the top of the page, there’s a text field labeled Add Title. Enter the title of your post here. WordPress will also use this title to create your post’s URL (slug), which you can edit if needed.
![]()
4. Write Your Post Content
- In the content editor area below the title, you can start writing your post.
- WordPress uses the Block Editor (Gutenberg), which lets you add content in blocks like paragraphs, images, videos, and more.
- You can add a block by clicking the + icon or typing / in the editor and choosing the type of content block you want to use (Paragraph, Heading, Image, List, etc.).
5. Format Your Post
- Use the formatting options in the toolbar to adjust text style (e.g., bold, italic), align text, or create links.
- You can also insert special formatting blocks, such as quotes, lists, or layout columns, using the + icon.
6. Set Categories and Tags
- On the right-hand side, you’ll find options to categorize your post:
- Categories help organize your content into broad sections. You can select an existing category or create a new one.
- Tags are optional but help in further organizing content with more specific keywords.
- Categories are broader groupings (like topics), while tags describe specific details or themes in the post.
7. Set a Featured Image (Optional)
- In the right sidebar, click on Set Featured Image to choose an image that may be shown in blog listings, social previews, or at the top of the post, depending on your theme.
8. Preview Your Post
- Before publishing, it's a good idea to preview how your post will look to your visitors. Click on the Preview button at the top-right corner to see a live preview of your post.
Tip: You can preview your post on different devices (desktop, tablet, mobile) using the preview toolbar.
9. Publish Your Post
- Once you are satisfied with your post, click on the Publish button at the top-right corner.
- WordPress will ask you to confirm by clicking the button again. After this, your post will go live on your website.
Tip: If you're not ready to publish, you can click the arrow next to Publish and choose Save as Draft.
10. Drafts, Scheduling, and Visibility Settings
- Save as Draft: If you’re not ready to publish yet, you can save your post as a draft and return to it later.
- Schedule a Post: You can set a specific time and date for your post to be published. This is helpful for planning future content.
- Post Visibility: Set your post to be public, private, or password-protected depending on your needs.


