Verkkotunnuksen uudelleenohjaus (redirect) on hyödyllinen ominaisuus moniin tarkoituksiin. Olitpa sitten vaihtamassa brändiä, siirtymässä uuteen verkkotunnukseen tai yhdistämässä useita sivustoja yhteen, uudelleenohjaus varmistaa, että käyttäjät ja hakukoneet ohjataan oikealle sivustolle ilman virheellisiä linkkejä.
cPanelin avulla voit helposti luoda sekä tilapäisiä että pysyviä uudelleenohjauksia verkkotunnuksille. Tässä ohjeessa käydään koko prosessi läpi vaihe vaiheelta.
Miksi verkkotunnuksen uudelleenohjausta käytetään?
Tavallisia syitä uudelleenohjaukselle:
-
Verkkotunnuksen vaihto: Haluat siirtää liikenteen vanhalta domainilta uudelle.
-
Brändin uudistus: Yrityksen tai sivuston nimi on vaihtunut.
-
Yhdistäminen: Haluat ohjata useiden verkkotunnusten liikenteen yhdelle sivustolle.
-
URL-rakenteen muutokset: Sivuston sivurakenne on muuttunut ja vanhat osoitteet täytyy ohjata uusille.
-
www- ja http-versiot: Haluat ohjata liikenteen www- ja ei-www-versioiden tai http/https välillä.
Näin uudelleenohjaat verkkotunnuksen cPanelissa
Vaihe 1: Kirjaudu cPaneliin
-
Avaa selaimesi ja mene cPanel-kirjautumissivulle, esimerkiksi https://minundomain.fi/cpanel.
-
Kirjoita käyttäjätunnus ja salasana.
-
Klikkaa Kirjaudu sisään.
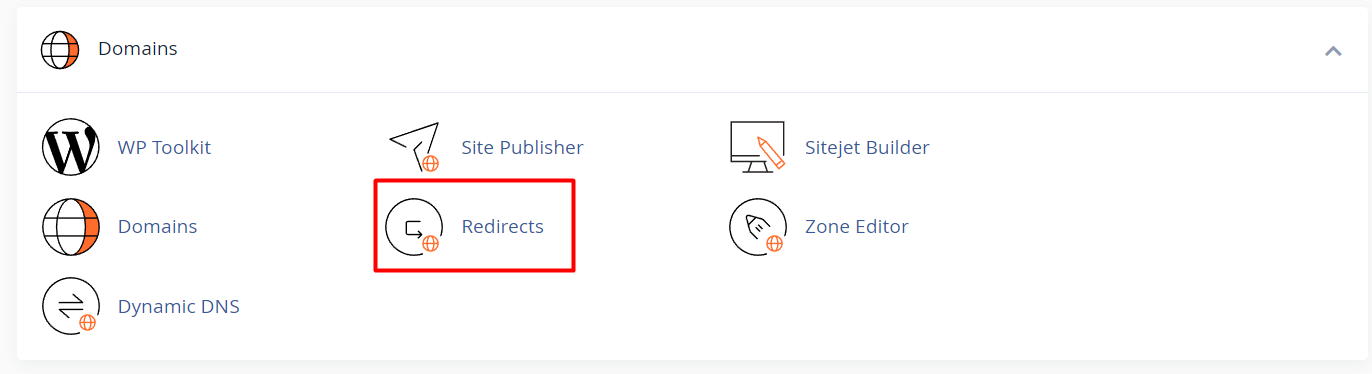
Vaihe 2: Avaa Uudelleenohjaukset (Redirects)
-
cPanelin hallintapaneelissa siirry kohtaan Verkkotunnukset (Domains).
-
Klikkaa Uudelleenohjaukset (Redirects).
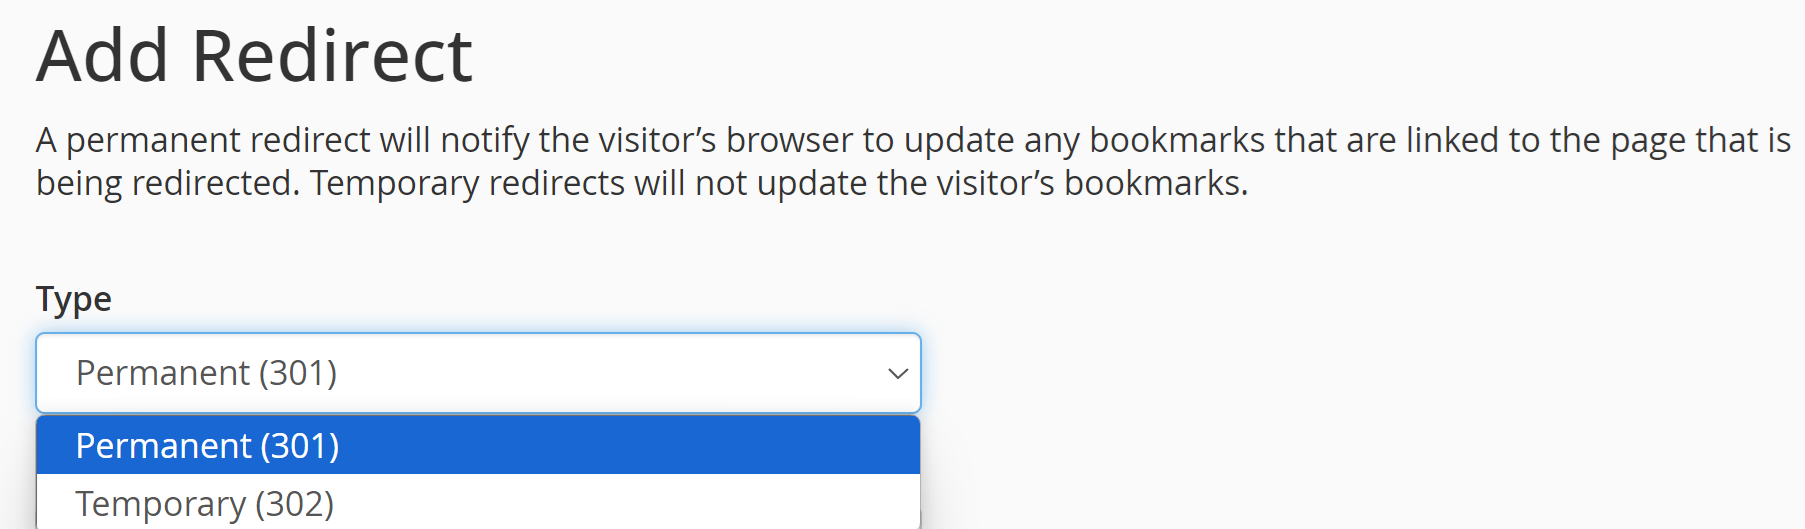
Vaihe 3: Valitse uudelleenohjauksen tyyppi
-
Pysyvä (301): Käytä tätä, jos muutos on pysyvä. Tämä on paras valinta hakukoneoptimoinnin kannalta.
-
Väliaikainen (302): Käytä tätä, jos aiot palauttaa alkuperäisen osoitteen myöhemmin.
Vinkki: Ellet ole varma, käytä 301-uudelleenohjausta.
Vaihe 4: Valitse ohjattava verkkotunnus
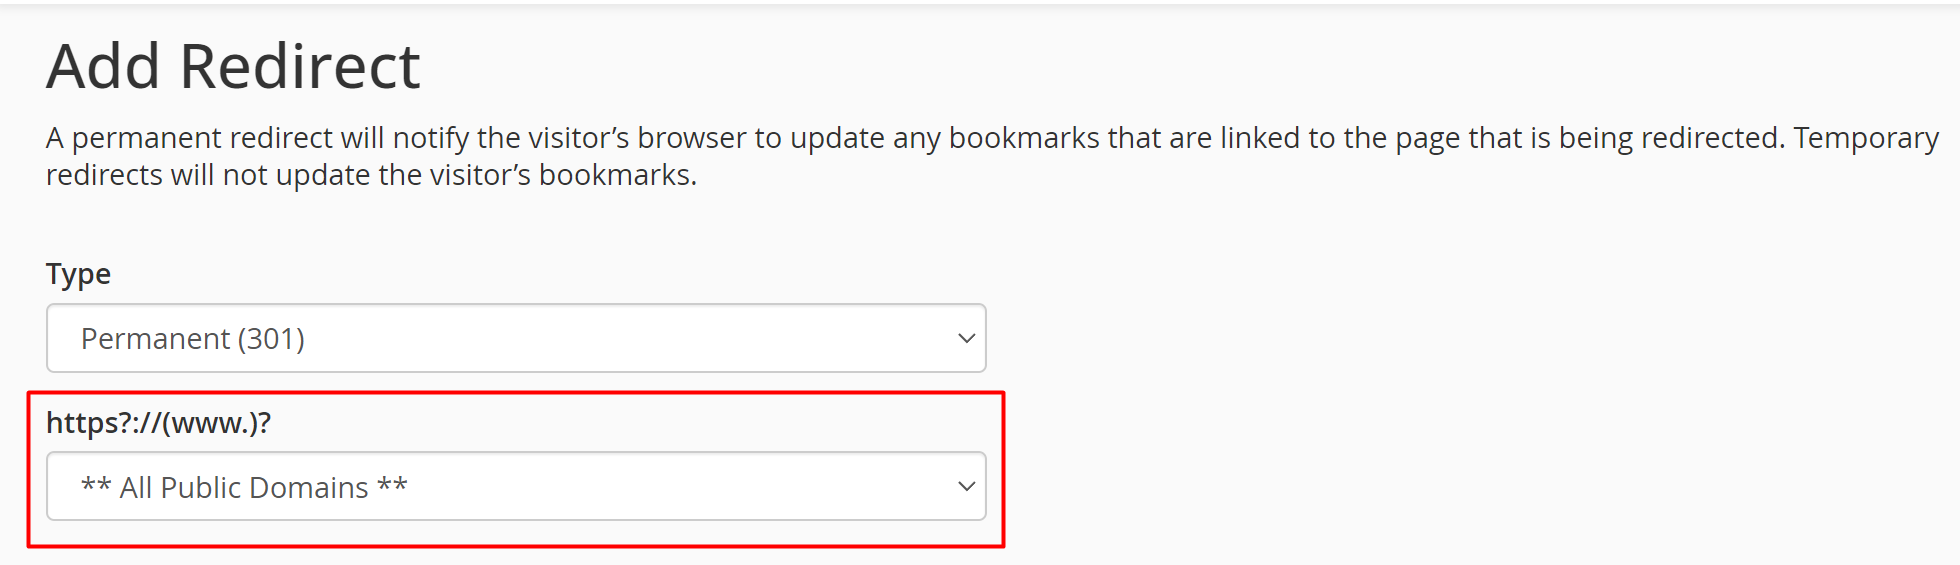
-
Valitse pudotusvalikosta verkkotunnus, jonka haluat ohjata.
-
(Valinnainen) Lisää polku, jos haluat ohjata vain tietyn sivun tai alikansion.
Vaihe 5: Syötä kohdeosoite
-
Kirjoita Uudelleenohjataan osoitteeseen (Redirects to) -kenttään osoite, johon haluat ohjata (esim. https://uusidomain.fi).
-
Varmista, että osoite alkaa jokohttp:// tai https:// riippuen määränpääsivuston asetuksista.
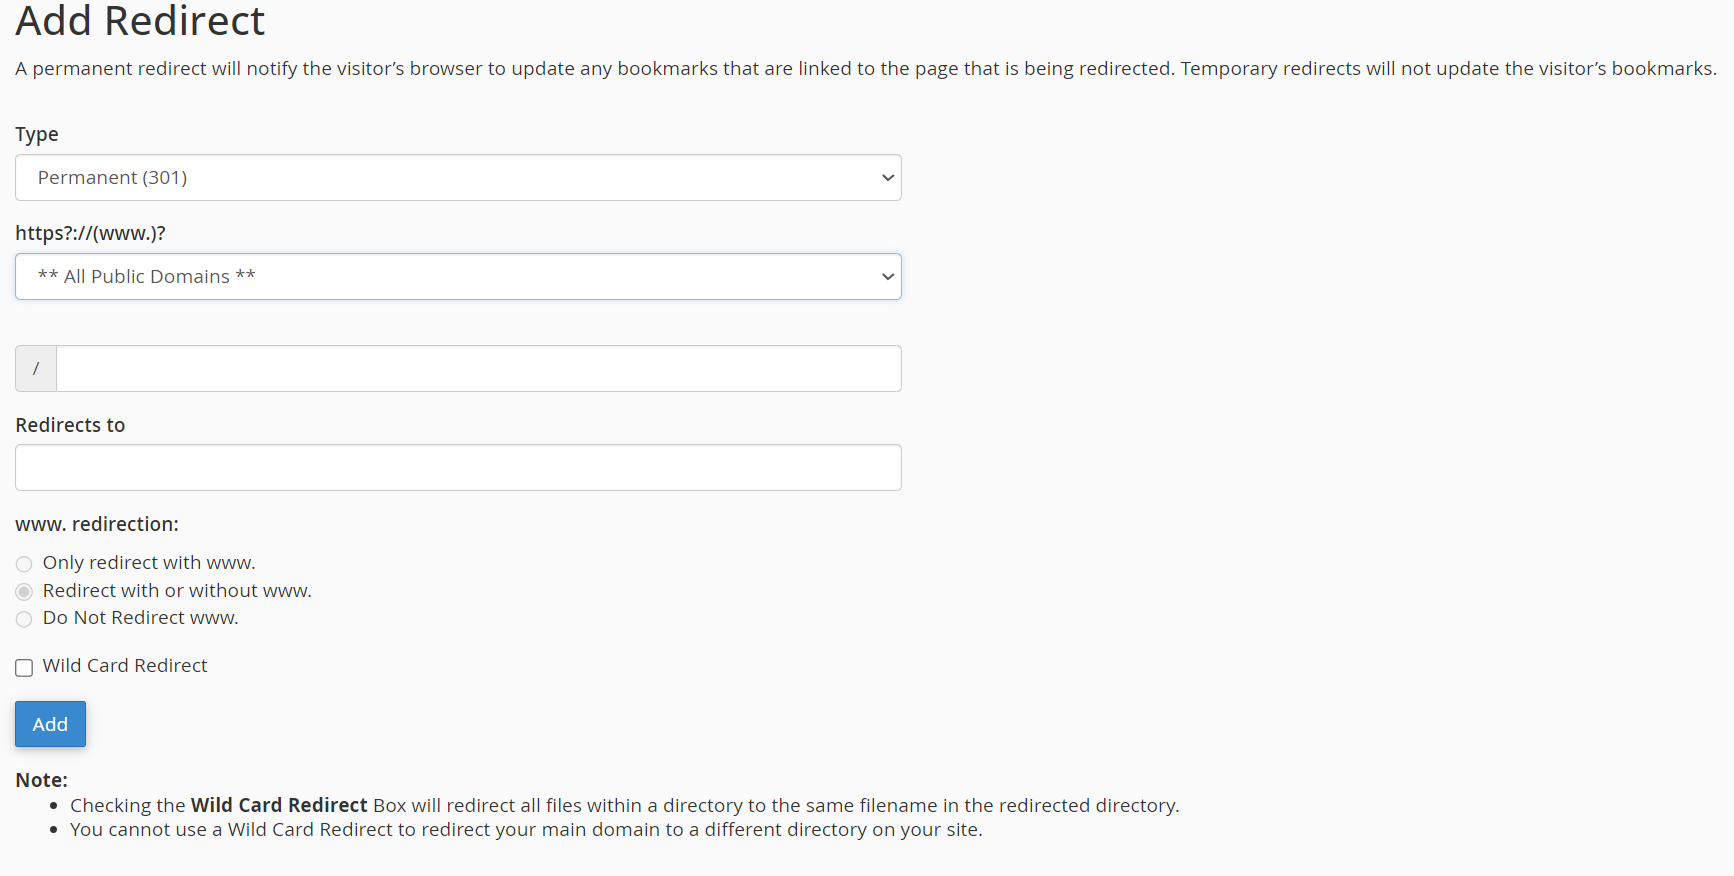
Vaihe 6: Valitse www-asetukset
-
Vain www: Ohjaa vain, jos osoite alkaa www:llä.
-
Ohjaa sekä www että ilman: Ohjaus toimii molemmilla versioilla.
-
Älä ohjaa www: Ei ohjaa www-versiota.
Vaihe 7: Ota käyttöön Wild Card -uudelleenohjaus (valinnainen)
-
Valitse tämä, jos haluat ohjata kaikki sivut ja tiedostot vastaaville paikoille uudessa domainissa.
-
Esim. vanhasivusto.fi/sivu1 → uusisivusto.fi/sivu1.
Huom: Ilman tätä valintaa ohjataan vain pääverkkotunnus.
Vaihe 8: Lisää uudelleenohjaus
-
Klikkaa Lisää (Add) vahvistaaksesi uudelleenohjauksen.
-
Näytölle tulee vahvistus siitä, että ohjaus on lisätty.
Vaihe 9: Testaa uudelleenohjaus
-
Avaa uusi välilehti selaimessa.
-
Kirjoita vanha osoite.
-
Tarkista, että selaimesi ohjautuu automaattisesti uuteen osoitteeseen.
Lisävinkit ja huomioitavaa
HTTPS-ohjaukset
-
Jos sinulla on SSL-varmenne, varmista että kaikki liikenne ohjataan https://-versioon.
-
Voit myös ottaa käyttöön HTTPS-uudelleenohjauksen kohdasta Verkkotunnukset > Pakota HTTPS-uudelleenohjaus (Force HTTPS Redirect).
Hakukoneoptimointi (SEO)
-
Käytä 301-uudelleenohjausta aina, kun muutokset ovat pysyviä.
-
Näin säilytät sijoitukset hakukoneissa.
Vältä ohjaussilmukoita
-
Älä ohjaa domainia itseensä.
-
Testaa aina ohjaukset varmistaaksesi, ettei silmukkaa muodostu.
Jos tarvitset apua tai kohtaat ongelmia, ota yhteyttä Lanetti-asiakastukeen – autamme mielellämme.


